Smart 4×4 Storage Systems: How to Organize Your Vehicle for Camping and Overlanding
Spend less time searching for gear and more time enjoying the adventure.
One of the biggest improvements you can make to any 4×4 camping setup isn’t a new suspension, rooftop tent, or expensive accessory.
It’s better organization.
Whether you’re heading out for a single night or a week-long adventure, a well-organized vehicle makes every trip easier. You’ll spend less time unpacking, know exactly where your equipment is, and avoid leaving essential gear behind.
The best part?
You don’t need a custom drawer system or thousands of dollars in modifications to build an efficient storage setup.
Why Storage Matters
A good storage system should do four things:
- Keep gear organized
- Protect equipment from damage
- Make frequently used items easy to access
- Reduce setup and pack-down time
Every item in your vehicle should have a permanent home.
If you have to search for something, your system needs improving.
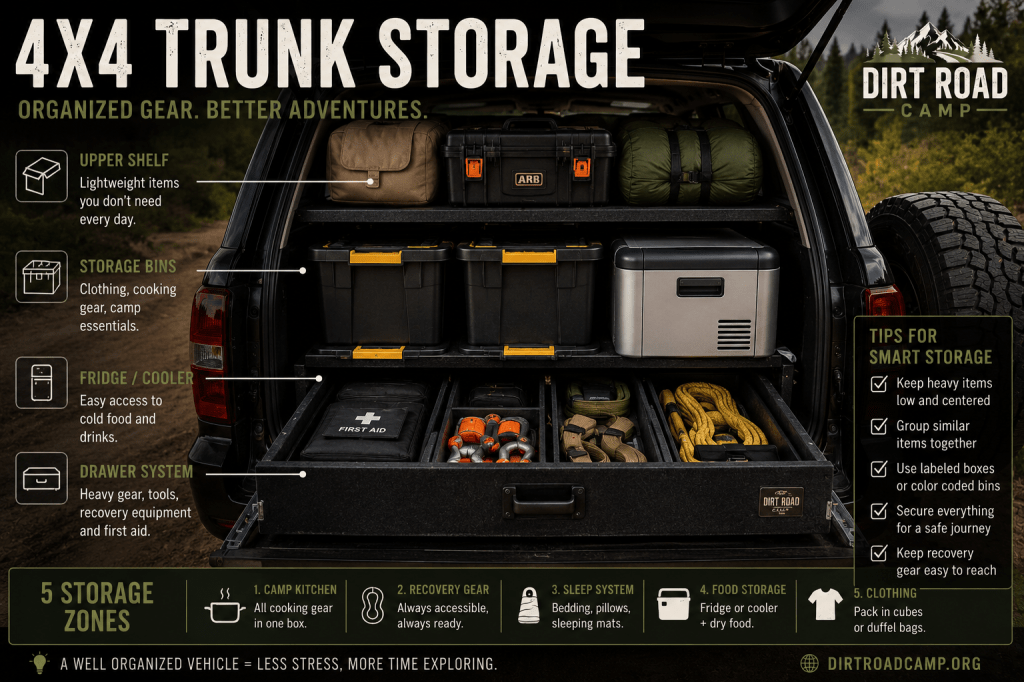
Think in Zones, Not Boxes
Instead of throwing equipment into random containers, divide your vehicle into functional zones.
Zone 1 – Camp Kitchen
Store everything needed for cooking in one container.
Include:
- Camp stove
- Fuel
- Pots and pans
- Utensils
- Plates and bowls
- Dishwashing supplies
- Coffee kit
When you arrive at camp, one box is all you need. A dedicated hanging camp kitchen organizer keeps all of this in one place and can hang right off the tailgate or a nearby branch.
Related Reading: How I’d Build a Practical Camp Kitchen
Zone 2 – Recovery Gear
Recovery equipment should always be easy to reach.
Store together:
- Recovery strap
- Soft shackles
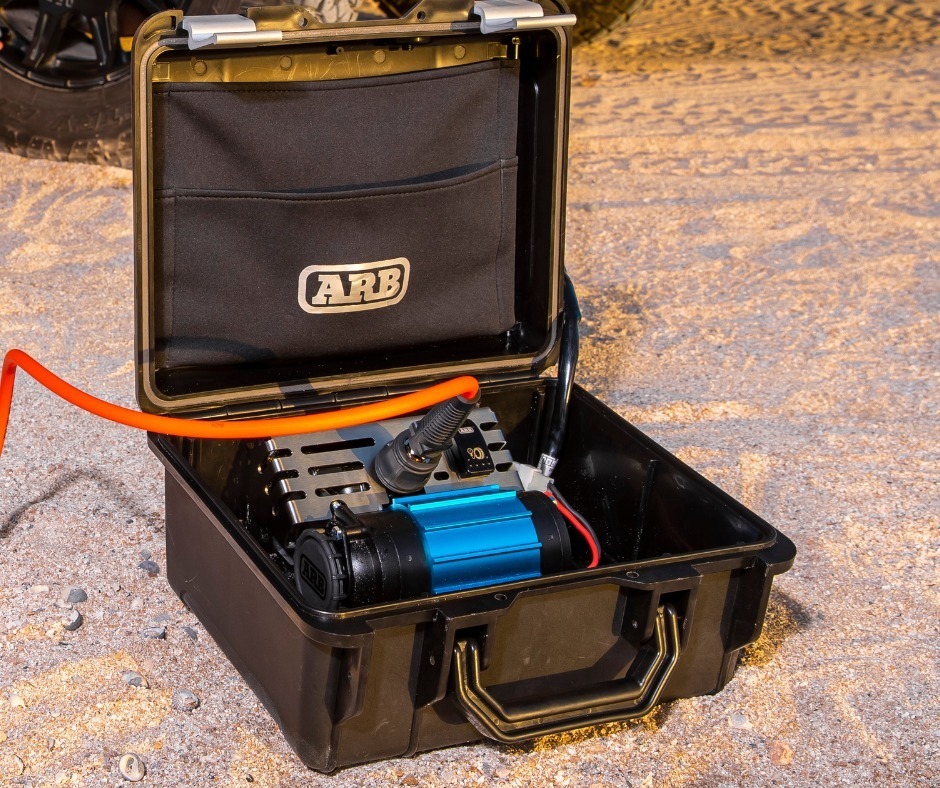
- Air compressor
- Tire pressure gauge
- Gloves
- Basic tool kit
A canvas tool roll keeps hand tools organized and visible instead of loose in a bag.
Never bury recovery gear under camping equipment. If you need it, you probably need it quickly.
Related Reading: Recovery Gear Every Overlander Should Pack
Zone 3 – Sleeping Equipment
Keep bedding together.
Pack:
- Sleeping bag
- Pillow
- Sleeping pad
- Blanket
Store these in soft duffel bags or waterproof storage sacks. A waterproof duffel bag keeps bedding dry even if it ends up on wet ground or in the back of an open truck bed.
Zone 4 – Food Storage
Separate food from cooking equipment.
A dedicated cooler or portable 12V fridge works best.
Dry food should be stored in sealed containers to keep it fresh and protect it from dust and wildlife.
Zone 5 – Clothing
Use packing cubes or small bags.
Separate:
- Daily clothing
- Cold-weather gear
- Wet clothing
- Spare footwear
Packing cubes save surprising amounts of time.
The Best Storage Containers
Choose containers that are:
- Stackable
- Dust resistant
- Durable
- Easy to carry
Avoid using lots of different container sizes.
Uniform storage boxes stack better and make your vehicle easier to organize. A heavy-duty lockable storage box is a solid, affordable place to start, and it’s easy to add more of the same size as your kit grows.
For vehicles that see frequent use, a drawer system is worth considering once you’re ready to invest further — it’s a bigger step up in price, but it turns loose gear into a fully organized, slide-out setup (more to come on that later).
Secure Everything
Loose gear becomes dangerous on rough tracks.
Use:
- Ratchet straps
- Cargo nets
- Tie-down anchor points
- Non-slip trunk/boot and drawer liners
Every box should stay in place, even on uneven terrain.
Keep Daily Items Accessible
Some gear gets used every day.
Store these where you can reach them without unpacking the entire vehicle.
Examples:
- Water
- First aid kit
- Headlamp
- Snacks
- Camp chairs
- Rain jacket
Accessibility is just as important as organization.
Storage Mistakes to Avoid
Packing Without a Plan
Random packing leads to frustration.
Assign every item a permanent location.
Buying Too Many Storage Boxes
More boxes don’t always mean better organization.
Start with a few quality containers and expand only when needed.
Mixing Categories
Don’t store recovery gear with cooking equipment or clothing.
Grouping similar items saves time.
Ignoring Weight Distribution
Place heavier items low and close to the center of the vehicle.
This improves handling and reduces movement while driving.
Our Recommended Beginner Storage Layout
Rear of Vehicle
- Recovery Box
- Kitchen Box
- Cooler
Behind Front Seats
- Water Container
- Daily Essentials Bag
Roof (Only if Needed)
- Lightweight camping gear
- Camp chairs
- Awning
- Empty storage bags
Avoid placing heavy equipment on the roof whenever possible.
Storage System Checklist
☐ Kitchen box
☐ Recovery box
☐ Clothing bag
☐ Cooler or fridge
☐ Water storage
☐ First aid kit
☐ Cargo straps
☐ Packing cubes
☐ Trash bag
☐ Camp lighting
Build Your System One Trip at a Time
No storage setup is perfect from the start.
After every trip, ask yourself:
- What did we use every day?
- What stayed packed the entire time?
- What was difficult to find?
- What could be packed more efficiently?
Small improvements after each adventure lead to a system that works for you—not someone else’s social media build.
Related Articles
If you’re just starting your overlanding journey, these guides will help you build a practical and reliable setup:
- The Ultimate Beginner 4×4 Camping Setup
- 21 Overlanding Accessories Worth Packing
- How I’d Build a Practical Camp Kitchen
- ARB Portable Air Compressor Review
Final Thoughts
A smart storage system isn’t about owning more gear.
It’s about making every piece of equipment easier to find, easier to use, and easier to pack away.
Start simple.
Stay organized.
Explore farther.
— Dirt Road Camp
Explore farther. Camp smarter.
Want the full packing rundown — vehicle prep, recovery gear, camp setup, navigation, and water & fuel all in one printable? Grab our free Beginner Overland Rig Checklist — link in bio, or download it right here on the site.


 Dirt Road Camp
Leave a comment